Working above your head can be a pain in the neck, but it’s worth the effort for a perfect ceiling. Keep the following pointers in mind:
- If you have to cut into a drywall ceiling, do it from the roof space if possible. You’ll keep the dust out of your face that way, but, more importantly, you’ll also eliminate the risk of cutting through unseen wires.
- Whenever you’re working on a ceiling from the roof space, place a box on the floor below to collect the debris that will fall.
- If you have to cut into a drywall ceiling from below, Switch off the power at the switchboard to start. Next, twist a corkscrew into the centre of the area of ceiling you’ll be taking out to make a handle.
- You can use a narrow-bladed saw to make your cuts, but for smooth, easy-to-patch edges, cut with a utility knife.
- Holes in the ceiling are unsightly and a potential hazard. To patch a medium-sized hole, first cut out a squared-up section around the damage, then cut out a replacement patch that’s just slightly smaller than the section you’ve removed. Attach a wooden cleat to the back of the patch so that it extends beyond the edges for about 8 centimetres (3 inches) on either side. Tilt and drop the patch into position and screw your cleat to the ceiling. Finish the joints with tape and jointing cement.
- When you’re patching a large hole, trim back the squared-up section to the centre of the ceiling joists on either side and secure your patch to the joists.
- Turn off the household power supply as a precaution when dealing with light fittings.
- Repairs to the edge of a ceiling rose generally do not carry any risk of electric shock.
- For small, difficult-to-reach holes and breaks in the drywall, use a small amount of expanding foam filler. Squirt some filler into the space. Then allow it to harden and cut away the excess with a sharp knife to finish.
Adding a cornice to your ceiling is a great way to freshen it up and add a touch of charm. Here’s how to do it.
What you will need
- Drywall cornice, 5-9 cm (2-3.5 in) width
- Drywall miter box
- Fine-toothed saw
- 7.5 cm (3 in) or 10 cm (4 in) broad knife
- Cornice cement
Before you begin
- The specialized adhesive used to attach the cornice to the wall is commonly called “cornice adhesive”.
- You’ll need about 1 kilogram (2 pounds) of cornice adhesive for every 8 metres (26 feet) of cornice you install.
- Follow the instructions on the pack to mix up the adhesive to a creamy consistency.
1. Make the cuts
- Place a full length of cornice in the miter box so that the ceiling edge sits in the bottom of the box and the wall edge sits on the far wall of the box.
- Cut the first length of cornice at a 45 degree angle to fit on the left hand wall of an internal corner.
- The cornice for the right hand wall will be cut at a 45 degree angle in the opposite direction.
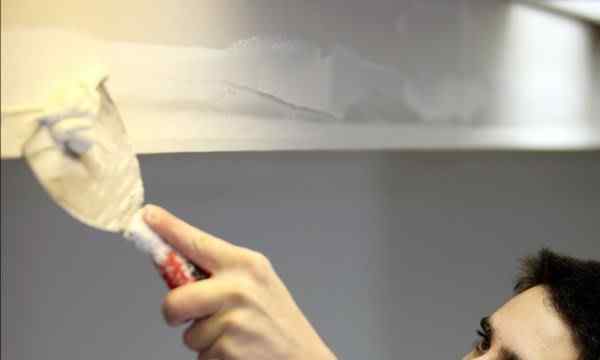
2. Paste in place
- Use your broad knife to apply the cornice cement along all the edges of your cornice, then firmly press the cornice into the wall and ceiling junction.
- Remove excess adhesive with your broad knife.
- Fill any gaps and smooth over with a wet brush or sponge.
- After you’ve installed all the cornices, go back and give all the mitered joints a second coat of cement.
- Leave the adhesive be until it is thoroughly dry.
Follow these pointers and keep this how to in mind to help perfect your ceilings.